Get started with your NOFOS charger
Everything important in one structured guide: installation, setup, daily use, maintenance and safety.
Introduction
What the charger does and why it stands out in everyday use.
Thank you for choosing the NOFOS smart wall charger. We built it to deliver a charging experience that is simple, practical and easy to use every day.
Key characteristics:
- Compact form factor at only 20x20x10 cm.
- An integrated 8x8 pixel display provides a quick overview of charger status.
- The button under the unit lets you override planned charging when needed.
- The fixed Type 2 cable is practical and avoids extra handling.
Installation guide
Safety, planning and physical installation.
Safety instructions for installation
- This product is intended only for charging electrically powered vehicles with non-gassing batteries.
- The charger must be securely mounted on a wall or structure that fully supports the back of the unit.
- Use outside the purposes described here is not permitted.
- Never modify components, software or connecting cables.
- Do not install the product near explosive atmospheres or where there is a risk of flowing water.
- The charger must be installed in a permanent location with sufficient load-bearing capacity.
Safety instructions for operation
- Do not use or touch the product if it is damaged or not functioning correctly.
- If a fire occurs, do not use water for extinguishing.
- Never clean the product with running water or high pressure.
- If the LED display shows an error symbol, review the status information before use.
- Make sure children do not play with the product.
- Do not use the charging cable if it is damaged or if the connections are wet or dirty.
- Do not use extension cords or adapters with the product.
- Make sure the charging cable does not create a tripping hazard or risk being run over.
- Protect the charger from direct sunlight, severe weather and strong electromagnetic fields when possible.
Planning the installation
Before installation, consider future charging needs so the solution can be expanded later. The maximum charging current is set during the initial configuration.
Check before starting
- Where should the product be installed?
- Is the building electrical capacity sufficient, or does it need to be increased?
- Does a new cable need to be installed or the incoming supply upgraded?
- Will additional chargers be added in the future?
- How is the electrical circuit protected?
- Which installation method will be used?
Pay attention to
- Correct grounding system, conductor selection and protective measures.
- Proper insulation of touchable and conductive parts.
- Sufficient cable dimensioning.
- Selection of overcurrent and overvoltage protection.
- Correct short-circuit calculation and installation method.
- Residual current monitoring for DC and AC residual currents.
Recommendations
- Use a 3-phase installation where possible to future-proof the setup.
- Use the largest approved cable cross section if possible.
Installation instructions
-
Remove the top cover
Carefully pull back the rubber edge and lift the cover up.
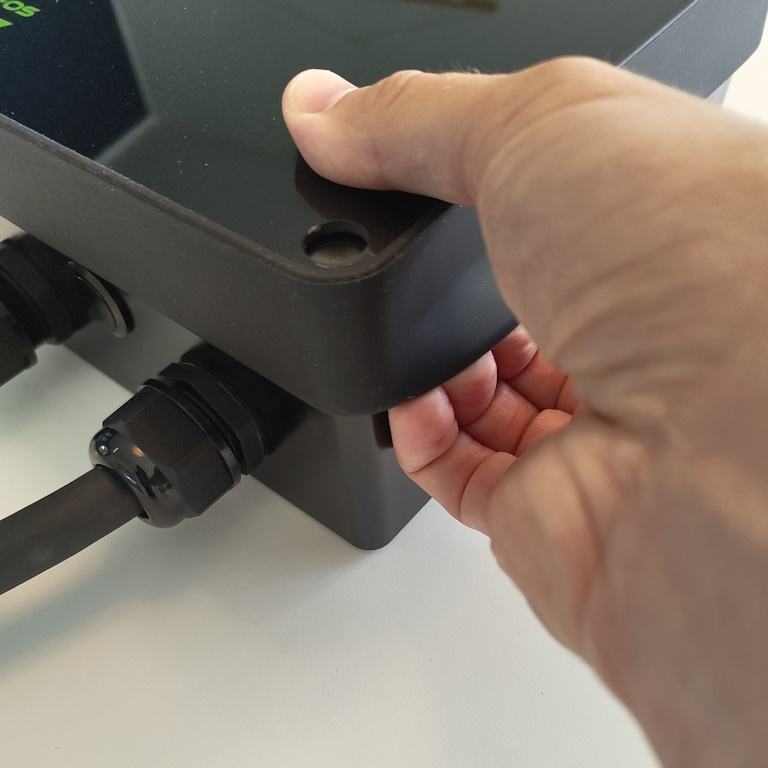
Open the charger from the top. 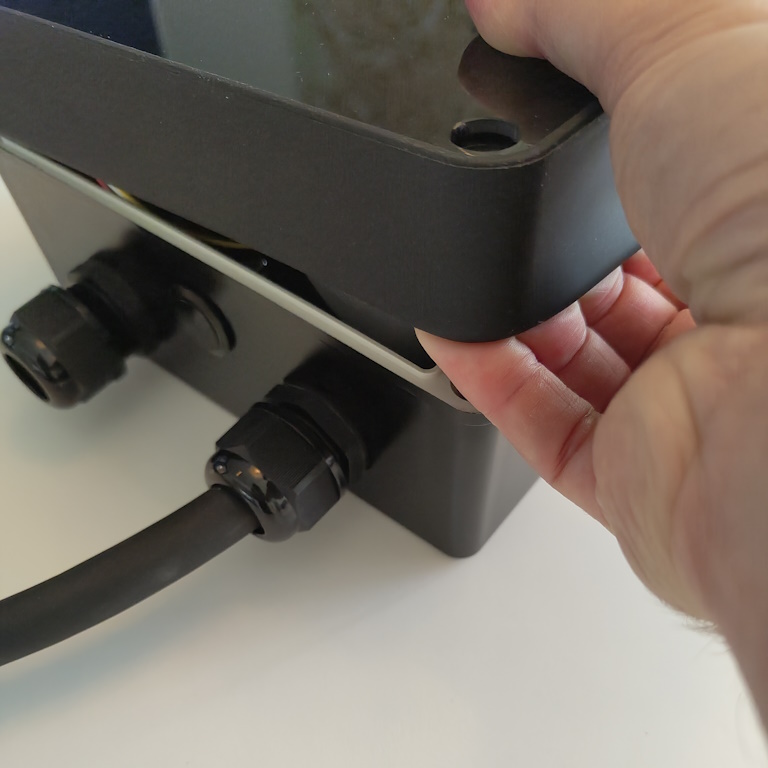
Lift the cover off carefully. -
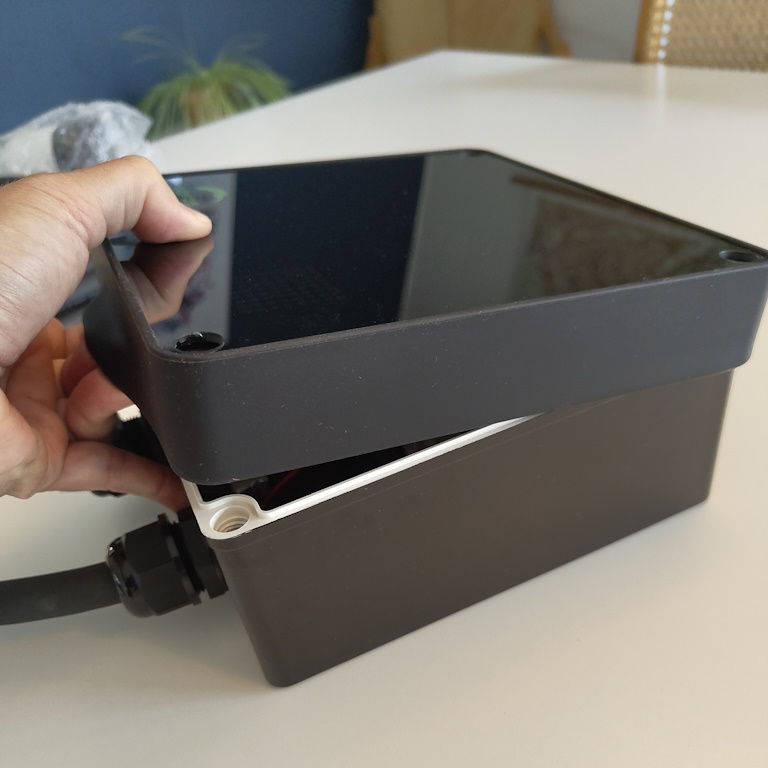
Disconnect the flat cable
Store the cover safely while mounting the unit.

Disconnect the flat cable from the cover. -
Mount the charger on the wall
- Use a TX15 screwdriver and the 4 supplied screws.
- Make sure the wall surface is even and flat. An uneven surface can crack the housing when the screws are tightened.
-
Install the wires
- Strip each individual wire by 10 mm. Ferrules are recommended for flexible conductors.
- For TN/TT 3-phase (230/400 V), install PE, N, L1, L2 and L3 in the marked terminals.
- For TN 1-phase (230 V), install PE, N and L1 in the marked terminals.
- Tighten the screws correctly.
- Before turning on the power, pull each wire to verify it is properly fixed.
-
Finish the installation
- Reconnect the flat cable to the cover.
- Reinstall the cover by gently pulling back the rubber edge and sliding it into place.
- Install the plastic screws and 4 rubber plugs without overtightening.
Refit the cover. 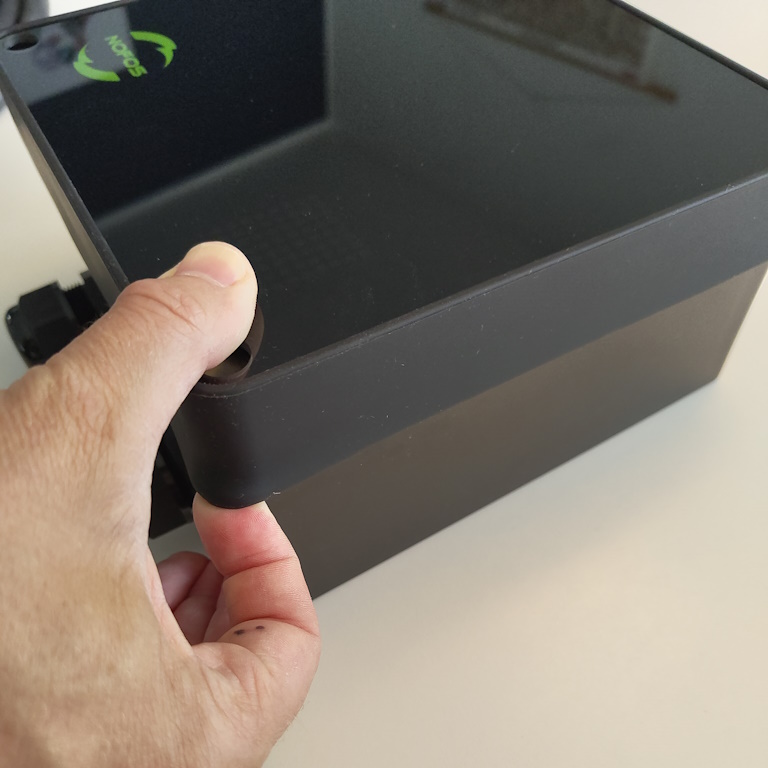
Finish and tighten carefully.
Setup
App flow, amperage selection and network connection.
NOFOS chargers are set up and managed through the "NOFOS: Smart EV charging" app, which is available here:
- Android: https://play.google.com/store/apps/details?id=com.nofos
- iPhone: https://apps.apple.com/dk/app/nofos-smart-elbil-opladning/id1589307196
Download and install the app. After that, set up an account for yourself if you did not already receive those details during the order.
Initial setup
- You set an amperage limit so the vehicle never draws more power than the installation can supply.
- You choose connectivity. At the moment, local WiFi is the supported selection in this flow.
- The charger is registered to your user account.
How to complete the setup
- Confirm that the product shows the "Ready to configure" animation.
- Tap the (+) icon in the lower-right corner of the app.
- When the charger appears as
nofos_XXXX, select it. - Set the maximum amperage allowed for the product.
- Select your WiFi network and enter the password.
- The charger restarts and connects to the selected hotspot.
| Amperage | 1 phase | 3 phase |
|---|---|---|
| 6A | 1.4 kW | 4.1 kW |
| 32A | 7.4 kW | 22 kW |
The charger is now fully configured and visible in the app device overview.
If the WiFi connection fails, the charger retries a few times. If it still fails, the device automatically returns to discover mode so you can repeat the setup.
If the charger becomes unresponsive, reset it by turning off the power supply and holding the interaction button while turning the power back on. Hold for 5 seconds, then release to return to discover mode.
Basic usage
What to verify before charging starts.
- The authorized electrician has completed the electrical connection correctly.
- The product is configured correctly.
- Check the charging cable and connector for damage, dirt and water ingress.
- Connect the Type 2 plug to the vehicle. Charging starts and adapts automatically to the car and available energy.
- If charging does not start, confirm charging is enabled in the car and that the plugs are fully inserted.
- If charging still does not start, review the installation according to this manual.
Maintenance, warranty and safety
Routine checks, cleaning and product compliance details.
Maintenance
If the product is installed in public spaces and accessible to everyone, local and national requirements apply in addition to the procedures below.
- Inspect the charger for signs of mechanical damage.
- Visually inspect the Type 2 plug for wear according to local rules.
- If the pins are discolored or damaged, contact an authorized electrician.
Cleaning
- Use a damp cloth and a household all-purpose cleaner.
- Avoid strong chemicals containing oil or alcohol, as they can discolor the plastic.
- Do not use running water or high-pressure cleaning.
Insulation testing
When performing periodic insulation testing of a charging circuit, it is recommended to remove the product before measuring between all joined phases and earth. Testing with the product installed can damage the electronics or affect the measurement.
Warranty
The device is free from material defects and complies with consumer protection laws in the country where it was purchased. Correctly installed NOFOS chargers are covered by a 2-year limited warranty. If the charger requires repair during the warranty period, contact your NOFOS supplier. Further information is available at www.nofos.eu.
Safety
The product must be installed according to local low-voltage regulations. It is designed and tested according to EN 61851 and includes built-in residual current monitoring capable of disconnecting the circuit at 30 mA AC or 6 mA DC faults in accordance with IEC 61008 and IEC 62955.
Standards
NOFOS declares that this product, NOFOS Max, complies with the Low Voltage Directive 2014/35/EU, Radio Equipment Directive 2014/53/EU, EMC Directive 2014/30/EU and RoHS Directive 2011/65/EU. The full EU declaration of conformity is available at www.nofos.eu.